Wednesday, February 27, 2013

The Great Circle Glitter Search!

Hi Ladies, halfway through the week already! Woo! So I was thinking this week, That while showing you all these frankens has been fine and dandy, I feel like I may be doing you guys a disservice by not showing other brands which could be a great resource when frankening polish; and for that I apologize. So I have begun ordering from different supply companies gradually (this stuff can get expensive!). Now I have had a few people ask if I have any circle glitter (I didn't) so that was one of my first new supply purchases. Now let me tell you, finding solvent resistant circle glitter is NOT easy. It's probably why its all the rage with indies right now, supply and demand people! So I came across some glitters from a blog sale but neglected to pick them up at the time, and then regretted it later. However, I did find out that it came from an online store called Nail Labo which seemed to be a salon supply shop. From my mad google detective skills I also ran across a forum in which someone had contacted the store to discuss whether or not their glitter was solvent resistant. They replied with an emphatic yes so I went ahead and checked it out. Lo and behold, Nail Labo has CIRCLE GLITTER made by a brand called Erikonail. These glitters are $3.50 for a small pot so they are not very practical for bulk franken making but for me, they worked out perfectly. I picked up 2 types of circle glitter and 2 types of other glitter. Here are the results of the bleeding/curling testing:

Here are the 4 glitters that I purchased, a holographic circle glitter, a white circle glitter, a brown hex glitter, and a mint green micro glitter

Here are the results of testing for the circle glitters. The bottom photo was taken 24 hours after mixing. We have minimal to no bleeding into the base and no curling. Hiyooooo!

And here we have the brown hexes and teal micro glitter. Again, bottom picture shows the glitter 24 hours after mixing. Again, little to no bleeding whatsoever and curling.

So there you have it friends, Erikonail glitter is LEGIT, at least what I have tested so far. I cannot vouch for all of their glitters as not all are Erikonail brand but given how well this held up, you can bet I will be going back to test out more glitters. Can't wait to see what beauties I can come up with using these glitters! Anybody have any ideas? You can bet you will be seeing them in the next coming weeks!

Hope to see you ladies back on Friday for more franken goodness! Remember to always keep it classy and creative! xoxo

Erikonail Glitters can be found through the Nail Labo store, be sure to check out their other glitters and supplies as well. I purchased ERI-67, ERI-196, ERI-167, and ERI-37. I believe they do flat rate shipping  for $6.95

Monday, February 25, 2013

Review- F4 Polish Midnight Circus

Hello lovely ladies and (un?)happy Monday! My boyfriend and I went ahead and did our 5k over the weekend. Over some weird debauchery and confusion, we ended up getting started AND finishing dead last, lol. Doesn't bother me though, I still had fun. Other than that I worked some over time and kept close to home. It's been pretty much nonstop rain for the past three days so that kind of kills my getting out of the house buzz. Hope everyone else had a great weekend :)

Today we have a review of a brand I'm sure that sme of you have heard of and others who have not called F4 polish. You can find them on Etsy here or on Facebook here. F4 is an indie polish created by 4 sisters, Jenn, Lacey, and Lexy. I picked up my first F4 a few months ago on a whim based on another blogger review (found here). I headed over to their Etsy page and was immediately enamored with Midnight Circus. This polish had it all, fine black matter glitter, white matte squares, and multi colored almost satin matte hexes. I mean, HELLO, what's not to love? So I went ahead and picked it up.  When the polish came to me in the mail, I was obsessed immediately. That was, until I put it on. This thing was thick, and I mean thick, The polish would get clogged in the neck of the bottle when I was trying to apply it and dry time took FOREVER. I ended up adding a few drops of thinner and that made a world of difference with the application issues. Dry time was average and coverage was pretty decent. I'm not sure it is a full coverage type polish but the glitter spread easily without having to dabble it or place glitters.

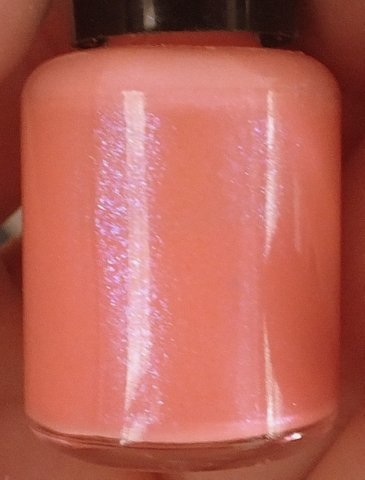
I put Midnight Circus over Cult Nails Annalicious which is a stunning glowy red jelly with strong gold and orange shimmer. Pictures show two coats, still with some VNL (visible nail line):

Check out how this polish seems to just glow from the inside out

STRONG gold and orange shimmer

Color accurate bright red color

I then added 2 coats of Midnight Circus and this little nail fiesta was created:

Macro to show you the shapes of the glitter and the coverage

To test out the customer service, I asked that they put a smiley face somewhere on the order and they put this little guy on the bottle. Love it!


Now I layered this over a red, but I'm sure this polish would look equally eye catching over pretty much any color...ever...except brown. Brown would probably be weird. Midnight Circus was still a bit thick but manageable after thinner. It needed a tad bit of help with leveling but I know this was due to the ridiculous glitter ratio up in that thing.

So here is the bad news, apparently, Midnight Circus is no longer in the listings. HOWEVER, F4 has many other awesome polishes including a few that are pretty comparable to Midnight Circus. I'm sorry to do that to you but I felt this polish was too amazing not to shout it from the rooftops.  

Well that's it for today, see you back on Wednesday for more polish awesomeness. I am testing out some new glitters and I can't wait to show you what I have found so far (hint, the glitter shape rhymes with mound)! So until next time ladies, always keep it classy and creative!

xoxo

Cult Nails Annalicious (LE) can be purchased here
F4 Polish can be purchased here


Friday, February 22, 2013

Shattered Glass

Welcome back ladies and let us rejoice, Friday is upon us again! I'm looking forward to a craft/wine night with some of my girlfriends. It will give me a chance to get ahead with frankening! Anybody have any last minute requests for polishes they'd like to see made? Other than that my boyfriend and I have a Wounded Warrior 5k on Saturday and home improvement projects for the rest of the weekend; no really, TRY to contain your excitement. Does anybody else have anything fun going on? I may need to live vicariously through you. So today I have a new top coat to show you. This one was super easy too. I filled the majority of a bottle up with TKB Luster base then added one scoopful each from the majority of TKB's colors for their Mermaid Collection, Fairy Violet, Seawitch Green, Blue Diamond, Gold Dust, and Siren Red. What came of it was a wonderful almost flakie looking polish that looked great over any color but really POPPED over a dark base. I named it Shattered Glass!

Sun shot, sorry about blinding you on that

Bottle shot...swoon

One coat shown over from index to pinkie, naked nail, Cult Nails Manipulative, Wet 'n' Wild Black Creme, and Essie Lady Like

And BOOOOOOM, money shot! Sweet sweet macro!

I'm sold, I love the delicateness of the glass fleck and the fact that it compliments pretty much any color beautifully. It dried surprisingly smooth given how jam packed with flecks it was. I will even bet that you can make that baby opaque in about 3 thick coats. The polish leveled well and dry time was a smidge longer than normal, nothing too off putting.

And this concludes Shattered Glass. I hope everyone has an awesome weekend. I look forward to seeing your bright shining faces on Monday! Until next time, remember to keep it classy and creative!

xoxoxo

Today's Supples Came From:
TKB Luster Base and Mermaid Collection: TKB Trading

Thursday, February 21, 2013

So I am not ENTIRELY technologically handicapped

and I put a Facebook widget up! Woohoo! Like FrankenFemme on Facebook and it MAY or may not be the way to another giveaway! Dunno...hmmm....

Wednesday, February 20, 2013

Electric Feel

Happy Wednesday my beautiful readers! I hope your week is going well! I was in Savannah over the weekend, which was great by the way, and since I've been back at work I've been running around like a chicken with my head cut off. A stressed out, overworked, headless chicken....yeah.... So anyways, todays franken is definitely a bright one, which I know I could use because its been pretty rainy here in Tallahassee. I named this franken after MGMT's Electric Feel who's video, I'm pretty sure, is one big acid trip played to music (please note that I DO NOT condone the use of drugs of any type, don't go getting crazy ideas now). If you haven't heard the song or seen the video, let me enlighten you here. This polish reminds me of the part where they break open the moon and rub whatever is in there all over themselves (lost you haven't I? Go watch the video!). I started off with about half to almost 2/3 of a bottle of TKB's Luster Base, I then added a good 3 scoopfuls of TKB Starbites in Cherika Moon. Starbites have a bigger size than the average shimmer and therefore when mixed with polish, give off more of a glass fleck or chunky shimmer. Per TKB, Cherika moon shifts from blue, to purple, to red orange. However, in this polish its more blue, to purple, to hot pink. I then topped off the bottle with Color Club Pure Energy, which is a neon blue with very fine shimmer from the 2009 Electro Candy Collection. Found this at Ross. Seriously, Ross is a great resource for buying frankening polish. They are usually anywhere from $5.99 to $8.99 for a collection of 6 or so. So seriously, check it out. Anyways, what was born was a neon blue glass fleck with subtle shift, check it out!!

Macro, you can see the glass fleck shift around the edges of the nail


Haha duochrome shift! You thought you could avert me but I have caught you! I win!


Swatch with flash to show you how glowy the polish is between the neon and the glass fleck

I personally think this is gorgeous and pretty fitting with a name like Electric feel! This polish was thick due to the amount of glass fleck in it but it definitely was not unmanageable. Dry time was average but given that a neon polish was used in the base, top coat is definitely necessary (neons tend to dry a little bit matte). Opaque in two thickish coats.

Well that's it for today ladies, looking forward to next post, we finally have another topcoat! Next week I will work on reviewing some of my newly acquired supplies and maybe some other indie polishes? Can't wait to see you back here next time!

But until then, make sure to always keep it classy and creative!

xoxoxo

Today's Supplies Were From:
TKB Luster Base and Cherika Moon Starbites: TKB Trading
Color Club Pure Energy: I found mine in a set at Ross but it can also be found here or here
(please note that I have never ordered from these vendors and therefore cannot vouch for their services)

Monday, February 18, 2013

Robotic Rainbow

Hello my frankenettes (trying the nickname out, lol) and welcome to the start of another brand new week. I went ahead a scheduled a post in advance as I am supposed to be coming home from Savannah today and will probably be exhausted. Yeesh, I hope the trip didn't suck. So anyways, todays franken was something that was kind of created as an afterthought, a kind of, "hey I haven't tried this franken product yet let's see what it's about" and I ended up La-la-la-LOVING this polish. I actually chose to wear this as a mani for about 4 days which is absurd when I think about how much I change polish. I started off with TKB's Glamour base (about half a bottle's worth) and then decided to test out my TKB magic diamond base. I added that in until the bottle was was about 80% full. I then added some Luminosty glitter and a couple drops of Wet'n'Wild black cream to darken up the overall base a smidgen. The result was a holo foil, a FRIGGEN HOLO FOIL. Robotic Rainbow seemed like a PERFECT name for this...

Blurred for the holo

Macro of the foil with a bit of holo peeking through


Swatch from an event last week where I managed to get the holo a bit without blurring. Enlarge it!

Now, being that I have never used magic diamond before, I probably used too much. This baby was super pigmented and a little bit thick, but not unmanageably so. I could probably get away with using less, but what I made this go around was pretty much a one coater. INSANE. Self leveled well and dry time was average. I can't even tell you how much I love this polish, there is just so much going on without it being overwhelming.

Well my loves, that is all from my sweet love child that I call Robotic Rainbow. See you back next time for more frankens!!

Today's Supplies Were From:
TKB Glamour Base, Magic Diamond, and Luminosity glitter: TKB trading
Wet'n'Wild Black Creme Polish: Walmart

Friday, February 15, 2013

Lily of the Nile

Hello and happy Friday! This weekend I am going to Savannah, Georgia with my mom to have a mother daughter weekend. It's a trip that we do every year; we pick a new city and spend the weekend there just hanging out. I'm really looking forward to spending time with my mom mom and just relaxing for a bit. But hey, if there is anyone who's been, is from, or is currently living in Savannah that knows of a few cool places to hit, let me know! Well today's polish is a simple duochrome which shifts from turquoise to blue to violet. The shift is subtle but the color is beautiful nonetheless. I started off with TKB's glamour base and added a fair amount of a cheap Wet 'n' Wild Black Cream polish to darken the base (this is supposed to help bring out the duochrome of the mica pigments). Finally, I added about 3 good sized scoops of TKB's Travel to Neptune pigment. I named this polish after the Agapanthus, or Lily of the Nile, which is a perennial flower that is known to be different shades of blue and purple. I think it encompasses the shade pretty well.

Here is two coats over Wet'n'Wild Black Cream

Low lighting, you can catch SOME of the duochrome around the edges of the nail (ha along with some polish I failed to cleanup) but this is the best I could coax out of it

Here is the bottle shot. Check out the shift in that thing. Where was that on my nails?!? Psssh...

So I feel like this polish does have the capability to be super duochromey, I mean, just look at that bottle! I just have to figure out how to get it to show. Maybe some sweet talkin? It was fairly  opaque after one coat and perfect after two. Not really brushstrokey. It self leveled easily and dry time was average. Dried to a smooth finish.

That's it for Lady of the Nile, looking forward to seeing you back on Monday for another franken creation. Until then, always remember to keep it classy and creative! See you guys soon!

Lastly, congratulations Thaisa C., the winner of my very first blog giveaway! I have sent you an e-mail and you have 48 hours to get back to me. As for you other ladies, don't you worry, the next giveaway will be at 50 followers and hopefully that will be here before you know it!

Today's Supplies Came From:

Glamour Base and Travel to Neptune Mica Pigment: TKB Trading
Wet'n'Wild Black Cream Polish: Walmart

Thursday, February 14, 2013

Impromptu Valentine's Day Post for my REAL Valentines!

Just a super quick post to show you one of my attempts at nail art. I used a holo foil franken that will be going up on the blog next week as my base color. Next I taped off sections of my ring finger in a checkerboard pattern and painted the un-taped sections with my Raspberry Crush franken. I then free handed hearts using Zoya Blaze and an unfolded paper clip (no your eyes are not crooked, my heart is, meh). 2 coats of top coat and done!

Ladies, whether you are single or not, I hope you have a great day and remember that you are perfect the way you are ;) Hokie but true! And everyone rejoice, this also means that chocolate will go on sale tomorrow!


Don't forget, today is the LAST day to enter my 20 follower giveaway! Best of luck to you loves and the winner will be posted tomorrow :)

Finally, Jenna over at JennaFroggy is having a blog sale if anyone wants to check it out!

Wednesday, February 13, 2013

Problematic Peach

Hello ladies! Well it's finally happened, I have frankened a complete fail *hangs head in shame*. This especially stinks because I feel that this polish had such potential but I just could not get the formula right. I had this idea for a bright warm weather peach with contrasting shimmer. Simple enough right? W.R.O.N.G.

 I started with a base of TKB Glamour base and added about 1/5 of a bottle I then added drop by drop Color Club Tangerine Scream that I picked up in a set from Ross. I followed up by adding 2 small scoops each of TKB's purple, aqua, and blue sparks. I didn't even bother naming this one, I just called it problematic peach.


This picture is the most color accurate

Now I know, this looks innocent enough in the swatches but I SWEAR, that thing could not figure out whether or not it was trying to be an OPI Liquid Sand or a cream polish so it just decided to be both at the same time. Terrible, lol. The first coat was streaky. The finish did smooth out a little bit more once it dried but it was a little matte and required a topcoat. And, no matter how hard I tried I could not catch a picture of the shimmer while it was on the nail. It was a little hidden but you could definitely see it in real life. Now, I'm sure if you don't mind finicky polishes, this one probably won't bother you too much but I still think that personally, I want to start back at square one with this delinquent shade. 

Ugh,

Well that's all for today. I do have have more promising polished to show you in the future!

And don't forget, the giveaway ends 2/14 so if you haven't entered, go do it now! Who doesn't want a custom polish made just for them??

See you ladies next week, ready to be classy AND creative!!

Today's Supplies Came From

Glamour Base, Aqua Sparks, Blue Sparks, and Purple Sparks: TKB Trading
Color Club Tangerine Scream: Random set found at Ross but can be found here or here (please note that I am not familiar with or affiliated with these sellers and therefore cannot vouch for their service or credibility)

Monday, February 11, 2013

Dolls and Dirt

Hey you, yes you, have you entered my giveaway yet? No? Well go, go now! It ends on 2/14! Who doesn't love a good custom franken? Anyways, I hope you've had a wonderful weekend! Walking Dead came back so that alone made my weekend worth it :) Today's franken is one that I am still trying to decide what I feel about it. I had this great picture in my mind of a semi-dark jelly base with pastel glitter peeking out. I started off with TKB Glamour Base and filled the bottle about 1/6th of the way with Color Club Status Update, which is a great dark true grey cream. I then added one small scoop of TKB's Luminosity (holo) glitter and two scoops of GlitterMixBoutique's Edgy in Pastel Mix (matte black, pastel blue, pastel green, and pastel pink). The result was a dark grey , almost dirty jelly with matte black and pastel peeking out. The holo comes out in the sun which helps to lighten up the base a little more. Sometthing about this polish just reminds me of little girls playing in dirt (which I patricularly loved to do back in the day) hence the name Dolls & Dirt


Well there you have it, I am still kind of meh about mixing the grey and pastel together in a polish. What do you guys think? As far as the formula goes, I can't complain, it spread evenly, self leveled, and showed just enough depth for the glitters without requiring more than 2-3 coats. Well that's it for today. Looking forward to some new frankens this week that are not matte or glitter! Woo! Hope to see you back soon and as always, remember to keep it classy and creative :)

Today's Supplies Came From:

Color Club Status Update: This came from a Birchbox exclusive shade, found here
TKB Glamour Base and Luminosity Glitter: TKB Trading
Edgy in Pastel Matte Glitter Mix: Glitter Mix Boutique


P.S. GO ENTER MY FRIGGEN GIVEAWAY!


Friday, February 8, 2013

Groundling and Giveaways!

Hello ladies and welcome to Friday!! Woohoo! No special plans for me this weekend but I am hoping to get together with friends to play Cards Against Humanity. Those of you not familiar, think Apples to Apples only dirtier.... and possibly offensive. Now if you have an absolutely ridiculous and immature sense of humor such as I do, you will stinking LOVE this game. PLUS, the website will actually let you print out their playing cards for FREE. Now that's awesome. No let me forewarn you, if you are easily offended please do not play this game, just trust me on this. Now moving onto the polish. This one was pretty simple, another matte. Looking back on my blog I have realized that I have barely done any straight shimmers or creams so I think I will probably get working on that. As always, if you have any request, let me know! So today's polish I called groundling because for some reason it reminds of me of dirt (cute right?) and water. I started off with matte polish base (Hard Candy's Matte-ly in Love), I then added about 3 scoopfuls of MAC's blue-brown pigment, an AWESOME red toned brown with blue flash. I shook it up and cheked it out and it was pretty, but just not... done. The base was a little too light and red toned for my liking and it didn't have enough oomph. I then followed up by adding two scoops of TKB's blue sparks and adding a few drops of brown cream polish to darken the base. After that final shake, I was pretty happy and Groundling happened!

Bottle shot which really shows off the blackened base with the blue shimmer

Here is the matte with one coat of topcoat. The shimmer comes out to play more this way and the base is slightly lighter.

Macro


This shade turned out really vampy, which I thought was pretty cool as it was offset by the blue shimmer. It was pretty ridiculously streaky with the first coat, great by the second coat, and perfect by the third. Being a matte, dry time was fast (don't forget, this also means you have to paint fast to avoid dragging and bald spots!).

Alright my loves, lets's get to the REAL reason you are here, my very first blog giveaway, as promised! Just want to thank everyone for being awesome and following me on my blog journey! This contest will be open for one week and to US RESIDENTS ONLY (shipping is a beast, sorry!) Just enter the rafflecopter giveaway and the winner will be notified at the end of the contest. The winner will receive one custom full size franken (which they create) made personally by yours truly :) Good luck everyone!


a Rafflecopter giveaway

Today's Supplies Came From:

MAC Blue Pigment: DIllard's
Matte Base: Hard Candy Matte-ly In Love and plain black cream polish: Walmart
TKB Blue Sparks: TKB Trading

Wednesday, February 6, 2013

Random Ramblings and a Giveaway!


Good morning my lovely lacquered ladies! Hope your Wednesday is treating you well! I'm thinking that I might be under some sort of manicure curse because in the last two days I have broken FOUR (yes four) different nails, and even the same nail twice. This is clearly some sort of polish retribution I'm unaware of. So anyway, today's post is going to be kind of random. Real quickly just wanted to show you a couple of swatches of polishes I made for some other ladies that are going into the mail today. If your interested, I can post the recipes once they receive them in the mail (so most likely next week?)


First up is a polish I made for a lovely lady in my PAA FB group who offered to send me a bottle of Essie's Shine of the Times (I can't find it ANYWHERE in Tallahassee!). In return, I swapped her a franken which she requested be blue, green, or teal as well as glass fleck or duochrome. Now I am pretty lucky and I have some duochrome glass fleck in my supplies so I was able to create this:


Look ma, a broken nail!


Forgive the dreadful lack of clean up on that (kind of embarrasing, seriously lol). This picture was for swatching purposes to test the polish while I was making it. I used two different types of glass fleck so it gives it an almost multichrome glass fleck appearance.

Next up is a polish that was made for a lovely blogger who was awesome and helped me out when I was just starting. I sent her a polish as kind of a thank you :)


This is kind of awesome and I kind of love it. Might be making some for myself! This is just the bottle shot as for some reason I didn't seem to save any pictures when I swatched it on a couple nails.

Finally, I was thinking about doing a giveaway when I reach 20 followers. The deal would be a winner would be randomly chosen (let's see if I can figure out Rafflecopter!) and she would receive a custom full size franken of her choice. This would be my way of saying thank you to the ladies who have started my journey into blogging with me. And to get completely mushy and honest, I just wanted to let you guys know, that regardless of the amount of followers I have, I really appreciate EVERY one of you. Even if I never got another follower, just being able to meet the amazing people I have so far and read their encouraging comments makes that alone worth it for me. So at the risk of sounding like a total dork, thank you, really. I love each and every one of you :)

Well that's it for today ladies, see you back on Friday for more franken awesomeness! Until then, remember to always keep it classy and creative!

Monday, February 4, 2013

Surfin USA *** Pic heavy ***

Hello ladies! Hope you had an awesome weekend! I watched the Big Game last night but if we are being completely honest here, I didn't care much for either team. I was rooting for the commercials, lol. Well that and food...because food always wins. Ha! So today's terribly named franken (seriously people I need help naming here) is going to be pretty pic heavy because this thing freaked my camera the eff out. I am absolutely in love with this one though, it reminds me of everything I have to look forward to in the coming months, sun, fun, beaches....ahhhh. So this polish was made by starting off with TKB's Luster base. I then added a couple drops each of a Color Club set I found at Ross (I want to say it's the Electro Candy Collection from 2009?) of both the orange and pink colors until I ended up with a very orange based coral base. From there I added two scoops each of neon pink matte hex and brick red matte hex. Finally I added three scoops of matte yellow hex. From that was born the shade that screams summer, which I call Surfin' USA! Pictures will be shown in both shade and the sun to help better demonstrate the true color of the polish


This my friends, is what it looks like when your camera has a temper tantrum. But it does show how incredibly bright and cheery this polish is


The shade shots help to show you the base color as well as how well it works with the pink, yellow, and brick red glitter. Also, given the jelly of the polish, you can totally see the depth of the glitter!

So this shade is pretty sheer initially. Pictures show three coats with absolutely no VNL. This thing has a great concentration of glitters and did not need to really be placed or dabbled to get the coverage you see here. Surprisingly enough, one coat of top coat made this smooth. Auuggh, I'm in love! Makes me happy just looking at it! 

Well ladies that's all for today, see you back next time, we have another matte! Wahoo!! Looking forward to see you again and until next time, remember to keep it classy and creative! Muah!

Today's supplies came from:
Luster Base: TKB trading
Pink and Orange polish: random set found at Ross
Matte hot pink, brick red, and yellow hexes: Glitter Mix Boutiqe


Friday, February 1, 2013

Mermaid Tails

Woohoo its Friday! We made it! I'm looking forward to sleeping in and hopefully learning to use my camera a little bit more. I'm still learning to take swatch photos and trying to shoot this polish reminded me of what a photography noob I really am, ugh. Today's polish has no specific inspiration, I kind of just decided to throw a bunch of stuff in a bottle and hope for the best. What came out was definitely difficult to photograph and somewhat finicky to apply, but definitely beautiful. I started with TKB's Glamour base and added a turquoise cream which was unnamed from a Color Club set that I found at Ross. I then added  two scoops each of green and blue mylar flakes, and finally, one scoop of TKB purple sparks. What ended up being created could not be described as anything other than positively, mermaid. It had a total whimsical ocean vibe which I loved. But I did warn you, this thing was beastly hard to photograph so first I will post photos in the sun, and then in the shade


So there you have it, my MULTIPLE attempts to try and capture this ridiculous polish. It was difficult to try and capture both the purple shimmer and the flakies at the same time. Now given the base, it was pretty dreadfully streaky at the first coat (maybe it would help having it less pigmented?). It can be evened out at two or three coats depending on how heavy handed you are when you put polish on. Another thing that was a mild annoyance is if you are not watching what you are doing, the mylar flakes in the polish can end u poking out past the tips of your fingers and you can feel it when they are brushed up against things (you can see it in the sunlight macro shot). However, they are easily moved on the nail using the polish brush. One coat of top coat smoothes it out well but I recommend two coats for a glassy finish. Seeing it in real life I would TOTALLY say that this polish is worth the minor trouble.  Well that's all for this mermaid's tail, see you back next time for all new franken creations! Always keep it classy and creative and have a wonderful weekend :)

Today's Franken Supplies came from:

TKB Glamour Base, blue flakies, green flakies, and purple sparks: TKB Trading
Turquoise Color Club Cream: Random polish set found at Ross
Related Posts Plugin for WordPress, Blogger...